Introduction
Imagine the irresistible sizzle of butter melting in a hot skillet, filling your kitchen with that warm, nutty aroma that promises pure comfort. Golden-brown bread crisps up to perfection, cradling gooey, molten cheddar that stretches in long, cheesy pulls with every bite. The first taste? A symphony of creamy sharpness, crunchy edges giving way to velvety smoothness—it’s the Classic Grilled Cheese Sandwich that hugs your soul on a chilly afternoon or elevates a simple lunch to nostalgic bliss.
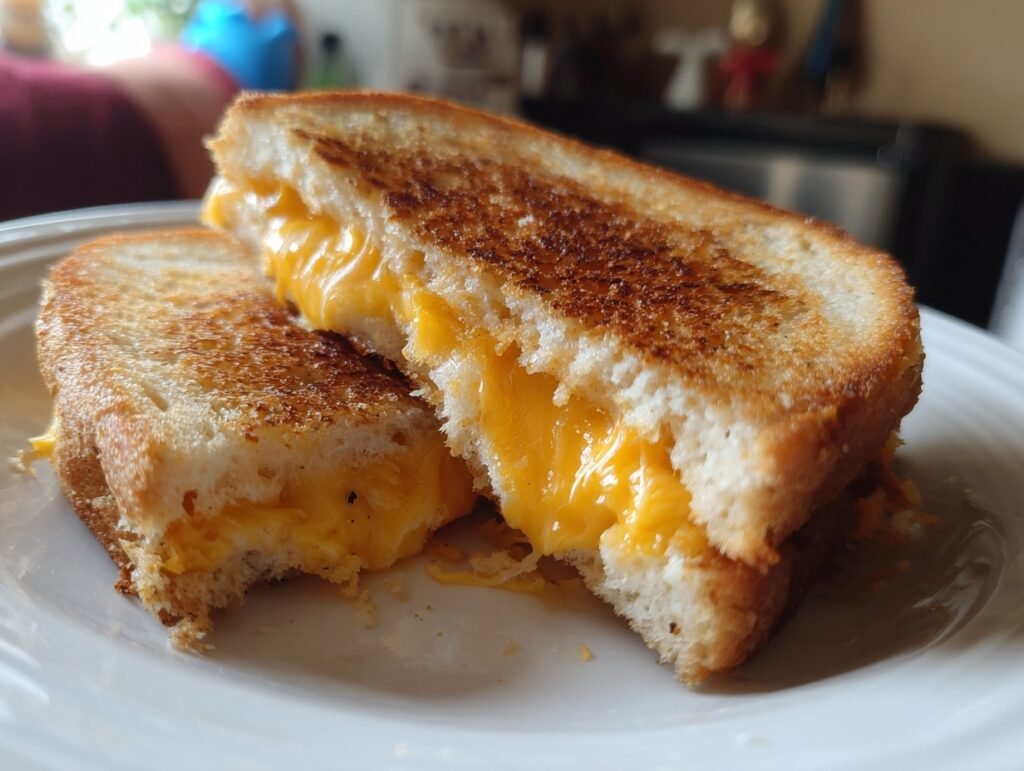
This timeless Classic Grilled Cheese Sandwich isn’t just food; it’s a visual masterpiece ready for your Pinterest board. Picture it sliced diagonally, steam rising, cheese oozing just right—stunning enough to stop scrolls and spark saves. With only three ingredients and minutes to make, it’s the easy win for busy days, kid-friendly meals, or impromptu gatherings. For more grilled cheese inspiration, check out this classic recipe from EatingWell. Whether you’re craving cozy vibes or a shareable snack, this recipe delivers that perfect crunch-melt magic that makes every bite feel like home.
Its simplicity shines on Pinterest: buttery edges glistening under soft light, vibrant orange cheese peeking through toasted slices. Whip it up solo or double for a crowd—it’s crowd-pleasing perfection that turns “hangry” into happy.
Why You’ll Love This Recipe
The Classic Grilled Cheese Sandwich wins hearts with its lightning-fast prep—under 10 minutes from start to finish—leaving you more time to savor the moment. That stunning golden crust and bubbling cheese create a Pinterest-perfect photo op, all while delivering emotional comfort like a warm embrace on a rainy day. Its versatility means it fits any mood, from solo indulgence to family feasts.
Shareability skyrockets here: slice it into triangles for adorable dips, or stack for brunch boards. The visual wow-factor—crispy exteriors contrasting oozy interiors—makes it a social media star, evoking joy and nostalgia that begs for pins and reposts. You’ll love how this simple joy sparks connections over every melty bite.
Ingredients

These humble heroes—soft bread, sharp cheddar, and rich butter—team up for textural magic: bread toasts crisp, cheese melts luxuriously, and butter adds golden sheen and nutty depth. Together, they create harmonious crunch, creaminess, and savoriness in every Classic Grilled Cheese Sandwich.
Ingredients (makes 1 sandwich):
– 2 slices sturdy bread, like sourdough or white (or whole-grain for heartier bite)
– 2 slices cheddar cheese, medium or sharp (or American for extra meltiness)
– 1 tablespoon butter, softened (or margarine for dairy-free option)
Quick Overview
– Prep Time: 2 minutes
– Cook Time: 6 minutes
– Total Time: 8 minutes
– Servings: 1
– Difficulty Level: Easy
This Classic Grilled Cheese Sandwich is a busy-day dream—grab ingredients, assemble, and cook with zero fuss. Its speed and simplicity make it ideal for weeknights or snack attacks, proving gourmet comfort can be effortless.
Step-by-Step Instructions

Get ready to craft the ultimate Classic Grilled Cheese Sandwich with confidence—these steps turn basics into bliss. Follow along for foolproof results that deliver crispy, cheesy perfection every time.
1. Prep your station: Lay out 2 slices of bread on a clean plate. Place 1 slice of cheddar on one piece, then top with the second slice for even melting. Press gently to adhere.
2. Butter the exteriors: Spread ½ tablespoon softened butter evenly on the outside of each bread slice (the crust sides). This ensures a golden, crispy toast without sogginess.
3. Heat the skillet: Place a non-stick skillet over medium-low heat. Let it warm for 1 minute—no oil needed, as butter provides the perfect sear.
4. Add the sandwich: Gently place the buttered sandwich in the hot skillet. Press down lightly with a spatula for full contact and even cooking.
5. Cook first side: Grill for 2-3 minutes, until the bottom turns deep golden brown and crisp. Peek at edges for that perfect toast—avoid high heat to prevent burning.
6. Flip with care: Lift with a spatula and flip the Classic Grilled Cheese Sandwich. The cheese should start softening; press again gently.
7. Cook second side: Grill another 2-3 minutes. Watch for cheese bubbling through the bread and a matching golden crust on this side.
8. Check doneness: Press the top—cheese should yield softly, fully melted inside. If needed, cover skillet for 30 seconds to speed melting without over-toasting.
9. Rest and slice: Remove to a cutting board. Let sit 1 minute for cheese to set slightly, then slice diagonally for that iconic, steam-showing presentation.
10. Serve hot: Dive in immediately for peak gooeyness. The Classic Grilled Cheese Sandwich shines fresh off the heat!
Pro Tips for Perfect Results
Elevate your Classic Grilled Cheese Sandwich with these pro secrets for unmatched texture and flavor—crispy outside, molten inside, every time.
1. Choose quality bread: Opt for thicker slices (½-inch) to hold the cheese without compressing. Sourdough adds tangy contrast to cheddar’s sharpness.
2. Room-temp butter is key: Soften it fully for even spreading—no tears or clumps. This creates that enviable glossy, non-greasy crust.
3. Low and slow heat: Medium-low prevents burning while melting cheese thoroughly. Patience yields bubbly perfection without raw centers.
4. Layer cheese edge-to-edge: Full coverage ensures no dry spots. Fold slices if needed for uniform melt and stretchy pulls.
5. Press for contact: Use a heavy spatula or panini press midway. This crisps evenly and compresses for compact, satisfying bites.
6. Test the flip: Lift a corner—if deeply golden and releases easily, flip. Undercooked? Give it 30 more seconds.
7. Boost presentation: Slice on the bias and prop upright on a plate. Steam rising against golden hues screams Pinterest gold.
Serving Ideas & Variations
Elevate your Classic Grilled Cheese Sandwich with vibrant pairings that turn it into a feast. Serve halved on a wooden board with colorful tomato slices and crisp pickles—the red-green contrast pops visually, while tangy juices cut the richness for balanced bliss.
For cozy vibes, dip into creamy tomato soup, letting cheese strands trail into velvety red. Pair with a side salad of peppery arugula and shaved veggies for fresh crunch. Kids love it with apple slices, their sweetness playing off cheddar’s bite.
Variations keep it exciting: Swap cheddar for pepper jack for spicy kick, or add thin tomato slices inside for juicy warmth (drain first to avoid sogginess). Make it gourmet with a sprinkle of herbs on buttered sides. For crowds, quarter into bite-sized pieces for party skewers—endless fun, same classic love.
Nutritional Highlights
This Classic Grilled Cheese Sandwich packs comforting satisfaction with real nourishment. Cheddar delivers protein for staying power and calcium for bones, while bread provides energizing carbs. Butter adds healthy fats for satiety, making it a balanced quick bite.
Per serving: ~400 calories, 18g protein, 30g carbs, 24g fat, 2g fiber. It’s a hearty indulgence that fuels without overwhelming, thanks to whole-food simplicity.
Storage Made Simple

Store your Classic Grilled Cheese Sandwich smartly to recapture that fresh crunch. Cool completely, then wrap tightly in foil or parchment. Refrigerate up to 3-4 days—keeps cheese from hardening and bread from drying.
For longer life, freeze uncut sandwiches between wax paper in a freezer bag up to 1 month. Thaw overnight in fridge. Reheat in a skillet over medium-low (2-3 minutes per side) or oven at 350°F for 5-7 minutes—crisp revival without sogginess. Microwave as last resort (20 seconds), but skillet reigns for texture.
FAQs
Can I make a vegan Classic Grilled Cheese Sandwich?
Absolutely! Swap bread for gluten-free if needed, use vegan cheddar slices and plant-based butter. It melts beautifully—grill as directed for the same gooey, crispy joy.
How do I fix a soggy sandwich?
Sogginess comes from high heat or wet ingredients. Cook low and slow, butter outsides only, and ensure cheese covers bread fully. Press firmly for crisp seal.
Can I prep Classic Grilled Cheese Sandwiches ahead?
Yes! Assemble (unbuttered) and stack with parchment; refrigerate up to 24 hours. Butter and grill fresh for best melt. Freezes great too—thaw before cooking.
What if my cheese isn’t melting?
Cover the skillet briefly after flipping to trap heat, or use thinner slices/room-temp cheese. Medium-low heat ensures even melt without scorching bread.
How do I scale up for a crowd?
Double or triple ingredients; use a griddle for batches. Prep stacks ahead, grill 2-3 at a time. Serve on a platter with dips—feeds 4-6 easily.
Is this kid-friendly and customizable?
Totally! Kids adore the stretchy cheese. Let them add safe extras like veggie slices. Cut into fun shapes post-grill for picky eaters’ delight.
Can I use a different bread?
Yes—sourdough for tang, rye for earthiness, or brioche for buttery luxury. Thicker cuts hold up best to prevent squishing during grilling.
Final Thoughts
You’ve got the blueprint for the Classic Grilled Cheese Sandwich that delivers endless comfort and Instagram-worthy glow. From first buttery sizzle to that final cheesy pull, it’s pure magic waiting in your kitchen.
Pin this now, make it today, and watch the shares roll in—tag friends for cozy duos! Your feed (and tastebuds) will thank you. What’s your twist? Save, share, and savor!