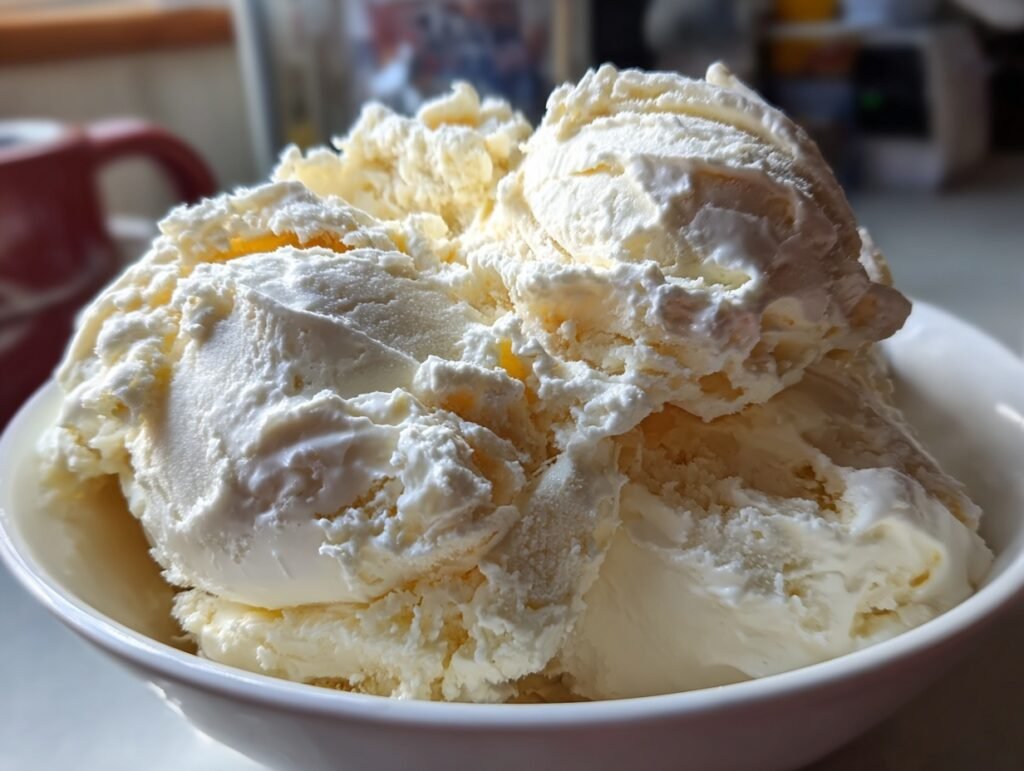
Imagine scooping into a cloud of creamy, velvety No-Churn Vanilla Ice Cream, where each swirl reveals a pristine white expanse flecked with tiny vanilla specks, melting luxuriously on your tongue with pure, sweet vanilla essence that dances like summer sunshine. The aroma is intoxicating—a whisper of warm vanilla pods mingling with the rich, buttery scent of freshly whipped cream, evoking childhood memories of lazy afternoons and endless joy. One bite, and you’re transported: silky smooth texture that coats your mouth, bursting with natural sweetness, no icy crystals in sight. This No-Churn Vanilla Ice Cream: Easy Homemade Recipe is your ticket to dessert nirvana without the hassle.
Perfect for Pinterest boards bursting with eye candy, this treat photographs like a dream—towering scoops crowned with fresh berries or drizzled in chocolate, glowing under soft light for those viral pins that rack up saves. No ice cream maker? No problem! With just three simple ingredients, you’ll whip up about a quart of restaurant-quality indulgence in under 10 minutes of active time. It’s visually stunning, endlessly customizable, and guaranteed to wow at parties or cozy nights in. For more no-churn inspiration, check out this ultimate guide to no-churn ice creams. Craving that perfect homemade scoop? Let’s dive in and make magic happen right in your kitchen.
Why You’ll Love This Recipe
This No-Churn Vanilla Ice Cream delivers pure bliss with zero equipment fuss—prep in minutes, freeze overnight, and serve swoon-worthy scoops that look pro-level gorgeous. Its effortless elegance means more time savoring the creamy dream and less time stressing, filling your home with the comforting scent of vanilla heaven. Picture plump scoops nestled in waffle cones, topped with vibrant summer fruits: instant Instagram gold that screams shareable joy.
Emotionally, it’s a hug in frozen form—nostalgic, indulgent, and versatile for any occasion, from backyard barbecues to midnight treats. The visual wow-factor? Swirls of pale ivory cream contrasting with colorful add-ins make every photo pop. Quick, crowd-pleasing, and endlessly adaptable, this recipe turns you into a dessert rockstar, sparking smiles and “seconds, please!” every time.
Ingredients
These three pantry-staple heroes—heavy whipping cream, sweetened condensed milk, and pure vanilla extract—team up for textural perfection. The cream whips into airy peaks for lightness, condensed milk adds silky sweetness and stability without cooking, and vanilla infuses floral depth, creating a lusciously scoopable treat that rivals gourmet shops.
Ingredients (makes about 1 quart):
– 2 cups heavy whipping cream (use full-fat for best texture; whipping cream works too)
– 1 can (14 oz) sweetened condensed milk
– 2 tsp pure vanilla extract (or vanilla bean paste for extra specks and flavor)
Quick Overview
– Prep Time: 10 minutes
– Cook Time: 0 minutes
– Total Time: 8 hours 10 minutes (mostly hands-off freezing)
– Servings: 8 (1/2 cup each)
– Difficulty Level: Easy
No-churn means ultimate convenience: mix, pour, freeze, done! Ideal for busy days when you want decadent results without the wait or mess of traditional machines. Your freezer does the work while you relax.
Step-by-Step Instructions
Ready to create your dream No-Churn Vanilla Ice Cream? This foolproof method builds confidence with simple steps, yielding ultra-creamy results that scoop beautifully every time. Chill a mixing bowl for pro tips, and let’s swirl up some frozen magic—no special tools needed!
1. Chill your equipment: Place a large mixing bowl and beaters (or whisk attachment) in the freezer for 10-15 minutes. Cold tools ensure the heavy whipping cream whips to maximum volume, creating that fluffy base for your No-Churn Vanilla Ice Cream.
2. Pour in the cream: Remove the chilled bowl from the freezer. Add 2 cups heavy whipping cream. Start beating on medium speed with an electric mixer until soft peaks form—about 2 minutes. Peaks should gently curl when you lift the beaters.
3. Whip to stiff peaks: Increase to high speed and whip until stiff peaks form, another 1-2 minutes. The cream will turn thick and glossy, holding sharp peaks. Stop just before it looks grainy to avoid overwhipping, which keeps the texture silky.
4. Prepare the mix-ins: In a separate large bowl, combine 1 can (14 oz) sweetened condensed milk and 2 tsp pure vanilla extract. Stir vigorously until fully blended and smooth. The mixture should be thick, sweet, and fragrant with vanilla notes.
5. Fold gently: Spoon about one-third of the whipped cream into the condensed milk mixture. Fold lightly with a spatula using a figure-8 motion to lighten it—scrape bottom to incorporate evenly without deflating.
6. Incorporate fully: Add remaining whipped cream in two batches, folding gently each time. The batter will be airy, pale, and ribbon-like when you lift the spatula. Swirl slowly for pretty marbled effects if desired.
7. Prep the pan: Line a 9×5-inch loaf pan (or similar 1-quart container) with plastic wrap or parchment, leaving overhang for easy removal. This prevents sticking and makes unmolding a breeze.
8. Pour and smooth: Transfer the mixture to the prepared pan. Spread evenly with the spatula, creating a smooth, domed top for picture-perfect scoops. Tap gently to release air bubbles.
9. Freeze overnight: Cover tightly with plastic wrap pressed directly on the surface (prevents ice crystals), then foil. Freeze for at least 6-8 hours, ideally overnight, until firm but scoopable.
10. Serve perfection: Let sit 5-10 minutes at room temp for easy scooping. Lift out using overhang, slice or scoop your No-Churn Vanilla Ice Cream, and garnish lavishly.
Pro Tips for Perfect Results
Elevate your No-Churn Vanilla Ice Cream game with these insider secrets for flawless texture, bold flavor, and showstopper presentation every time.
1. Super-chill everything: Freeze your bowl and cream for 20 minutes pre-whipping. This boosts volume by 50%, yielding ultra-aerated ice cream that stays creamy, not icy.
2. Quality vanilla matters: Splurge on pure extract or bean paste—the floral notes shine through. Avoid imitation for that authentic, heady aroma that makes spoons vanish fast.
3. Fold, don’t stir: Gentle folding preserves air bubbles for lightness. Overmixing deflates the mix, turning it dense—patience here equals cloud-like scoops.
4. Surface seal: Press plastic wrap directly on the ice cream before freezing. This blocks freezer burn and moisture, ensuring pristine texture for weeks.
5. Room-temp thaw: Let soften 10 minutes before scooping. It releases easily, holding shape for tall, photo-ready towers that impress.
6. Pan hack: Use a metal loaf pan for faster freezing. Glass works too, but chill it first to jumpstart the process without warm spots.
7. Flavor boost: Stir in seeds from a vanilla pod to the condensed milk for visual specks and intensified taste—Pinterest perfection!
Serving Ideas & Variations
Picture golden waffle cones brimming with No-Churn Vanilla Ice Cream, crowned with juicy strawberries and a chocolate drizzle—vibrant reds against creamy white for a pin-worthy stack that tastes like summer romance. Pair with warm berry compote for a fruity contrast, or nestle scoops between soft chocolate chip cookies for ice cream sandwiches that ooze indulgence at picnics.
Elevate dinner parties with elegant affogatos: pour hot espresso over scoops for silky, caffeinated bliss. Kids adore it as a sundae bar base—top with crushed cookies, nuts, or caramel swirls for customizable fun. For tropical vibes, layer with mango puree and toasted coconut.
Variations keep it fresh: swirl in crushed strawberries during folding for fruity ribbons, or mix in dark chocolate chunks for chewy bites. Add espresso powder to the base for mocha magic, or lemon zest for refreshing tang. This No-Churn Vanilla Ice Cream adapts endlessly, turning everyday treats into celebrations.
Nutritional Highlights
Heavy whipping cream provides rich fats for satiety and creaminess, while sweetened condensed milk delivers calcium for bone health. Vanilla extract adds antioxidants subtly. Per 1/2-cup serving (8 servings total): approximately 350 calories, 5g protein, 25g carbs (mostly from natural sugars), 28g fat (with beneficial saturated types for energy), and 0g fiber. Indulgent yet balanced for occasional delights.
Enjoy mindfully—this treat satisfies sweet cravings fully, thanks to protein-fat combo that steadies blood sugar better than sugary alternatives.
Storage Made Simple
Your No-Churn Vanilla Ice Cream stays scoopably perfect in the freezer for up to 2 months. Wrap the loaf pan tightly in plastic and foil, or transfer scoops to an airtight container with parchment between layers to prevent sticking. Label with date for freshness—thaw slightly for that ideal soft-serve texture.
For shorter storage, the fridge works 3-4 days in a covered container, though it softens quickly. No reheating needed; just let freezer-stored portions sit 10 minutes at room temp. Avoid refreezing thawed ice cream to maintain creaminess. Pro move: portion into single-serve containers for grab-and-go joy.

FAQs
Can I substitute the heavy cream?
Yes! Use full-fat coconut cream for dairy-free creaminess (chill can first, skim solids). It whips beautifully, mimicking the rich texture of No-Churn Vanilla Ice Cream. Avoid low-fat options—they won’t hold peaks well.
How far ahead can I make this recipe?
Prep up to 2 weeks ahead—it’s freezer-friendly! Make, freeze solid, then store airtight. Perfect for parties; just soften 10 minutes before serving. Flavor even deepens after a few days.
Why is my ice cream icy?
Likely from moisture or underwhipping. Ensure stiff peaks, seal surface tightly with plastic, and freeze fully 8 hours. Use cold tools next time for denser aeration in your No-Churn Vanilla Ice Cream.
Is this recipe nut-free or adaptable?
Naturally nut-free with these ingredients. Easily make it egg-free (no eggs used) or scale for allergies by swapping condensed milk with coconut version. Always check labels for cross-contamination.
How do I scale up for a crowd?
Double ingredients for 2 quarts—use a 9×13 pan. Whip in batches to avoid overfilling bowl. Freezing time stays similar; serves 16 easily. Great for summer bashes!
What if I don’t have a loaf pan?
Any freezer-safe 1-quart dish works—a round cake pan or Tupperware. Line with overhang for easy lift-out. Results are just as stunning for your No-Churn Vanilla Ice Cream.
Can I add mix-ins?
Absolutely! Fold in 1 cup berries, chocolate chips, or cookie chunks after Step 6, before freezing. Keep under 20% volume to avoid graininess—endless fun twists!
Final Thoughts
You’ve got the blueprint for No-Churn Vanilla Ice Cream that’ll steal hearts and fill your freezer with joy—effortless, exquisite, and oh-so-shareable. Whip it up tonight, snap those glossy scoops, and watch the pins soar. Your friends will beg for the recipe!
Save this pin now, tag a sweetie who needs this treat, and treat yourself to creamy happiness. What’s your dream topping? Share below—let’s build a community of ice cream dreams!