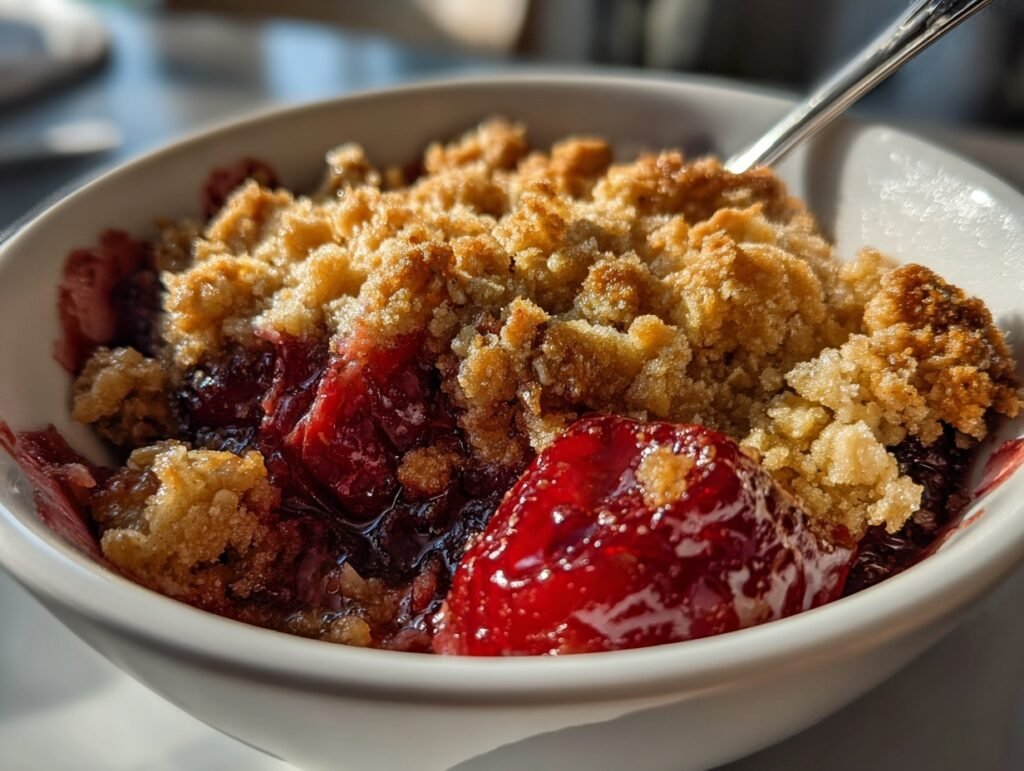
The moment you pull this Easy Cherry Crisp from the oven, your kitchen fills with the sweet-tart perfume of bubbling cherries mingling with warm cinnamon and toasted oats. Golden, buttery crumbles rest atop a glossy sea of deep ruby fruit, promising spoonful after spoonful of juicy cherries tucked beneath a perfectly crisp topping. Each bite delivers that magical contrast: bright, saucy cherries against a crunchy, lightly sweet oat blanket that melts on your tongue. This Easy Cherry Crisp captures everything we crave in a summer dessert—bright color, comforting texture, and effortless elegance that photographs beautifully for your feed. Whether you’re hosting friends or treating yourself after dinner, this recipe transforms simple pantry staples into something that feels special. For more inspiration on creating beautiful, wholesome desserts, check out these healthy dessert recipes. The vibrant red fruit against the golden oat topping creates that signature Pinterest pop that makes everyone double-tap and save.
Why You’ll Love This Recipe
This Easy Cherry Crisp comes together in under an hour with minimal fuss, yet delivers bakery-worthy results that will have everyone asking for the recipe. The contrast between the jewel-toned cherry filling and the rustic, golden crumble topping creates an irresistible visual that photographs like a dream in natural light.
Beyond the stunning presentation, this dessert brings people together—it’s the kind of comforting sweet that feels both nostalgic and fresh. Make it once and you’ll understand why it earns a permanent spot in your summer rotation, perfect for everything from casual weeknight treats to backyard gatherings.
Ingredients
Every component in this Easy Cherry Crisp works in harmony: tart cherries provide bright acidity and natural juiciness, while the oat-based topping delivers buttery crunch and warm spice notes that complement the fruit beautifully. The brown sugar adds caramel depth, and vanilla enhances the overall aroma.
– 4 cups fresh cherries, pitted (frozen cherries work too—just thaw and drain first)
– 1 cup rolled oats (old-fashioned oats create the best texture)
– 3/4 cup all-purpose flour
– 1/2 cup brown sugar (light or dark both work beautifully)
– 1/3 cup unsalted butter, melted
– 1 teaspoon vanilla extract
– 1/2 teaspoon ground cinnamon
– 1/4 teaspoon salt
Quick Overview
– Prep Time: 15 minutes
– Cook Time: 35 minutes
– Total Time: 50 minutes
– Servings: 8
– Difficulty Level: Easy
This Easy Cherry Crisp proves that impressive desserts don’t require complicated techniques or specialty equipment. With straightforward steps and ingredients you likely already have, you can create something that tastes and looks like you spent hours in the kitchen.
Step-by-Step Instructions
Creating this Easy Cherry Crisp is simpler than you might expect. Follow these clear steps and you’ll be rewarded with a bubbling, golden dessert that fills your home with incredible aromas.
1. Preheat your oven to 375°F and lightly grease an 8×8-inch baking dish or similar-sized oven-safe pan. This temperature ensures the topping crisps beautifully while the cherries cook down into a luscious filling.
2. Spread your 4 cups of pitted cherries evenly across the bottom of your prepared baking dish. If using frozen cherries, make sure they’re thawed and well-drained to prevent excess liquid from making the topping soggy.
3. In a medium mixing bowl, combine the 1 cup rolled oats, 3/4 cup all-purpose flour, 1/2 cup brown sugar, 1/2 teaspoon cinnamon, and 1/4 teaspoon salt. Stir these dry ingredients together until evenly distributed.
4. Pour the 1/3 cup melted butter and 1 teaspoon vanilla extract over the oat mixture. Using a fork or your fingertips, work the wet ingredients into the dry until the mixture forms loose, crumbly clumps that hold together when squeezed.
5. Sprinkle the oat crumble mixture evenly over the cherries, covering them completely. Don’t press down too firmly—you want those lovely, irregular crumbles that create texture and visual interest.
6. Place the dish on the center rack of your preheated oven. Bake for 30-35 minutes, watching for the topping to turn a rich golden brown and the cherry juices to bubble up around the edges.
7. Check at the 30-minute mark. If the topping needs more color, continue baking for an additional 5 minutes. The bubbling cherry filling is your visual cue that the dessert is ready.
8. Remove from the oven and let the Easy Cherry Crisp rest for 10-15 minutes before serving. This resting time allows the filling to thicken slightly and prevents burning your mouth on molten cherry juices.
9. For extra visual appeal, dust the top lightly with powdered sugar or add a scoop of vanilla ice cream just before serving—the contrast of cold cream against warm crisp is pure magic.
Pro Tips for Perfect Results
Master these simple techniques and your Easy Cherry Crisp will turn out perfectly every single time. Small details make a big difference in both texture and presentation.
Use room-temperature butter for melting—it incorporates more evenly into the topping and creates better clumping. Cold butter can seize and create uneven texture throughout your crumble.
Don’t skip the resting time after baking. The cherry juices need those 10-15 minutes to settle and thicken, preventing a runny mess when you scoop into it.
For extra crunch, toast your rolled oats in a dry skillet for 3-4 minutes before mixing them into the topping. This deepens their flavor and enhances that golden color.
Taste your cherries before assembling. If they’re particularly tart, add an extra tablespoon of brown sugar to the filling—it balances beautifully without overpowering the fruit.
Press some of the topping into larger clumps before sprinkling. These bigger pieces create dramatic texture and those Instagram-worthy craggy peaks that make the dessert look homemade and special.
Serving Ideas & Variations
Picture this Easy Cherry Crisp served in shallow bowls with generous scoops of vanilla bean ice cream slowly melting into the warm cherry juices—it creates rivers of creamy sweetness that mingle with the tart fruit. For a more elegant presentation, serve individual portions in clear glass dishes that showcase the beautiful layers of ruby filling and golden topping.
This dessert pairs wonderfully with afternoon coffee or tea, the warm spices complementing rich, dark roasts. At dinner parties, pass a pitcher of cold cream alongside so guests can add their own finishing touch. For brunch gatherings, try serving smaller portions alongside Greek yogurt—the creamy tang plays beautifully against the sweet-tart cherries.
To vary this Easy Cherry Crisp, swap half the cherries for blueberries or sliced strawberries when they’re in season. Add a handful of chopped pecans or almonds to the topping for extra crunch and nutty flavor. During cooler months, frozen cherries work just as well as fresh—just be sure to drain them thoroughly before using.
Nutritional Highlights
This Easy Cherry Crisp offers more than just delicious flavor—it provides meaningful nutritional benefits from its wholesome ingredients. Cherries are packed with antioxidants and vitamin C, while oats contribute heart-healthy fiber and sustained energy. The combination creates a dessert that feels indulgent while delivering real nutritional value.
Per serving, you can expect approximately 265 calories, 4g protein, 42g carbohydrates, 10g fat, and 3g fiber. The oats and fruit contribute meaningful fiber, while the moderate portion size keeps calories reasonable for a satisfying dessert.
Storage Made Simple
This Easy Cherry Crisp stores beautifully, making it perfect for meal prep or enjoying leftovers throughout the week. Once completely cooled, cover the dish tightly with plastic wrap or transfer portions to airtight containers. It will keep well in the refrigerator for 3-4 days without losing its delightful texture.
For longer storage, this Easy Cherry Crisp freezes excellently. Portion it into freezer-safe containers and freeze for up to 3 months. To reheat, simply warm individual servings in the microwave for 45-60 seconds, or place the entire dish in a 350°F oven for 15-20 minutes until heated through and the topping regains its crispness.
FAQs
Can I use frozen cherries instead of fresh? Absolutely. Thaw them completely and drain well before using to prevent excess moisture from making your topping soggy. The flavor will be nearly identical to fresh.
How far ahead can I make this Easy Cherry Crisp? You can assemble everything up to 24 hours in advance and refrigerate unbaked. Add 5 extra minutes to the bake time when cooking straight from the fridge.
My topping didn’t get crispy—what went wrong? This usually happens from excess moisture. Make sure cherries are well-drained, and consider baking an extra 5 minutes. Also ensure your oven temperature is accurate.
Can I make this recipe gluten-free? Simply swap the all-purpose flour for a 1:1 gluten-free flour blend. The oats are naturally gluten-free, though some are processed in facilities with wheat—check labels if needed.
What’s the best way to pit fresh cherries? A cherry pitter makes quick work of this task. No pitter? Use a sturdy straw or chopstick to push the pit out through the stem end.
Can I double this recipe for a crowd? Yes! Use a 9×13-inch pan and increase bake time to 40-45 minutes. Watch for the same visual cues: golden topping and bubbling edges.
Why did my cherry filling turn out runny? The filling thickens as it cools. If it’s still too loose after resting, return to the oven for 5-10 more minutes. Next time, you can toss cherries with 1 tablespoon cornstarch before assembling.
Final Thoughts
There’s something deeply satisfying about pulling a bubbling Easy Cherry Crisp from the oven and watching loved ones gather around for that first warm spoonful. This recipe transforms humble ingredients into something truly special—proof that beautiful, crowd-pleasing desserts don’t need to be complicated.
Save this pin for your summer dessert collection and share it with friends who appreciate simple, stunning recipes. Your future self will thank you when cherry season arrives and you’re ready to create this gorgeous, comforting classic again and again.