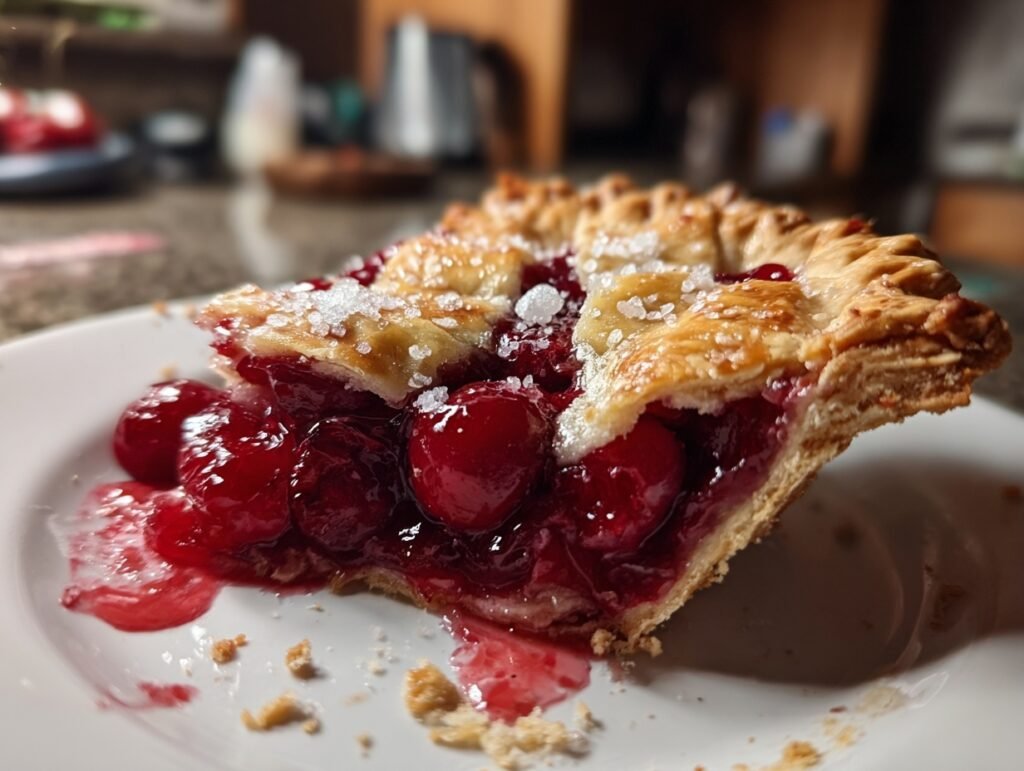
There’s something magical about slicing into a warm Easy Cherry Pie and watching that ruby-red filling bubble up through a golden, flaky crust. The sweet-tart cherries release their juices as you cut, filling the air with a comforting aroma that instantly says summer. Each bite delivers buttery pastry that shatters delicately against the glossy, jewel-like cherries, creating the perfect balance of textures and flavors that makes this classic American dessert impossible to resist.
This Easy Cherry Pie captures everything we love about nostalgic summer baking in one gorgeous package. With just six simple ingredients and a handful of pantry staples, you can create a dessert that looks like it came straight from a professional bakery. The deep crimson filling peeking through a perfectly latticed or vented crust makes this pie an instant star on any Pinterest feed, and the straightforward method means even first-time bakers can achieve stunning results. Whether you’re hosting a backyard barbecue or simply craving a taste of tradition, this recipe delivers every single time.
Explore more cherry pie inspiration here
Why You’ll Love This Recipe
The Easy Cherry Pie comes together faster than you’d expect from something this beautiful. With pre-made crusts and canned filling as your foundation, most of the work is already done, leaving you free to focus on the fun part: creating those Instagram-worthy crimps and decorative edges that make everyone ask for your secret. The result is a dessert that feels both nostalgic and fresh, perfect for sharing with family or bringing to potlucks where it always disappears first.
Beyond the speed and simplicity, this pie offers incredible visual impact that photographs beautifully from every angle. The contrast between the glossy cherry filling and golden crust creates automatic wow-factor, while the generous yield means there’s enough to feed a crowd or enjoy leftovers throughout the week. Best of all, the Easy Cherry Pie travels well and reheats beautifully, making it ideal for summer gatherings and holiday celebrations alike.
Ingredients
The beauty of this Easy Cherry Pie lies in how few ingredients it requires while still delivering maximum flavor impact. The canned cherry pie filling provides consistent sweetness and texture, while the refrigerated crusts eliminate the intimidation factor of homemade pastry. A touch of cornstarch thickens the filling to that perfect sliceable consistency, and the egg wash creates that professional golden sheen everyone admires.

– 2 cans (21 oz each) cherry pie filling
– 1 package (14.1 oz) refrigerated pie crusts (or homemade if preferred)
– 1/4 cup sugar
– 1 tablespoon cornstarch
– 1 teaspoon vanilla extract
– 1 egg, beaten (for egg wash)
Quick Overview
Prep Time: 15 minutes
Cook Time: 45 minutes
Total Time: 1 hour
Servings: 8
Difficulty Level: Easy
This Easy Cherry Pie proves that impressive desserts don’t require hours in the kitchen. The streamlined process uses convenience ingredients strategically, so you spend minimal time measuring and maximum time creating something that looks and tastes completely homemade. It’s the kind of recipe that makes you feel accomplished without the stress.
Step-by-Step Instructions
Creating this Easy Cherry Pie is surprisingly straightforward once you break it down into simple steps. The key is working with chilled crusts and allowing the filling to set properly after baking. Follow these directions and you’ll have a pie that rivals any bakery version.
1. Preheat your oven to 425°F and position a rack in the lower third. This ensures the bottom crust bakes thoroughly while the top achieves that perfect golden color.
2. Remove one pie crust from its package and unroll it into a 9-inch pie dish. Gently press it against the bottom and sides, allowing any excess to hang over the edge.
3. In a large bowl, combine both cans of cherry pie filling with the cornstarch and vanilla extract. Stir gently until the cornstarch dissolves completely and the mixture looks uniform.
4. Pour the cherry filling into the prepared crust, spreading it evenly with a spatula. The filling should mound slightly in the center for that classic pie shape.
5. Unroll the second pie crust and place it over the filling. Trim both crusts to leave about 1/2 inch overhang, then fold the edges under and crimp decoratively with your fingers or a fork.
6. Cut several small slits or a decorative pattern in the top crust to allow steam to escape during baking. This prevents the filling from bubbling over the edges.
7. Brush the entire top crust generously with the beaten egg, then sprinkle evenly with the sugar. The egg wash creates shine while the sugar adds sparkle and extra crunch.
8. Place the pie on a baking sheet to catch any potential drips, then bake for 45 minutes. Check at the 35-minute mark; if the edges are browning too quickly, cover them loosely with foil.
9. The Easy Cherry Pie is ready when the crust is deep golden brown and the filling bubbles visibly through the vents. The aroma will be intensely fruity and sweet.
10. Remove from the oven and place on a wire rack. Allow the pie to cool for at least 2 hours before slicing; this resting time lets the filling set properly for clean cuts.
Pro Tips for Perfect Results
Mastering the Easy Cherry Pie comes down to a few key techniques that ensure flawless results every time. These expert tips focus on achieving the ideal texture, flavor balance, and presentation that makes this dessert truly special.
Work with cold pie crusts straight from the refrigerator. Warm dough tears easily and loses its structure, while chilled pastry holds its shape beautifully during crimping and baking.
Don’t skip the cornstarch step. Even though you’re using pre-thickened pie filling, the extra tablespoon ensures the slices hold together neatly instead of running when cut.
Create an egg wash barrier by brushing the bottom crust lightly before adding filling. This simple step prevents the dreaded soggy bottom that can ruin an otherwise perfect pie.
Position your oven rack correctly. The lower third placement ensures direct heat reaches the bottom crust, eliminating any chance of an undercooked base.
Watch the edges carefully during the final ten minutes of baking. If they brown faster than the center, tent them with foil to prevent burning while the middle catches up.
Let the pie cool completely before slicing. The filling needs those two hours to set properly; cutting too early results in a runny mess instead of clean, beautiful wedges.
For extra visual appeal, create a simple lattice top instead of a solid crust. The woven strips showcase the vibrant cherry filling while adding professional-level presentation.
Serving Ideas & Variations
The Easy Cherry Pie shines brightest when served slightly warm with a scoop of vanilla ice cream slowly melting into the crimson filling. The contrast between the cold, creamy ice cream and the bubbling hot pie creates an irresistible dessert experience that feels both comforting and celebratory.
For special occasions, consider elevating your presentation with fresh mint sprigs or a light dusting of powdered sugar around the plate edges. The pie pairs beautifully with coffee, tea, or even a tall glass of cold milk. At summer gatherings, try serving smaller slices alongside fresh berries and whipped cream for an elegant plated dessert that feels restaurant-worthy.
This recipe adapts easily to seasonal variations. During peak cherry season, substitute half the canned filling with fresh pitted cherries tossed in a bit of sugar and lemon juice. For a rustic twist, bake the filling in individual ramekins with cut-out crust circles on top for charming personal pies. You can also experiment with adding a pinch of cinnamon or almond extract to the filling for subtle flavor variations that complement the cherries beautifully.
Nutritional Highlights
While the Easy Cherry Pie is undeniably a treat, it does offer some redeeming nutritional qualities. The cherries provide antioxidants and vitamin C, while the crust contributes energy-sustaining carbohydrates. Each slice delivers a satisfying combination of fruit and pastry that feels like pure indulgence.
Per serving (1/8 of pie): approximately 420 calories, 4g protein, 68g carbohydrates, 16g fat, 2g fiber. These values reflect the generous portions and rich ingredients that make this dessert so satisfying.
Storage Made Simple
Your Easy Cherry Pie keeps beautifully, making it perfect for make-ahead entertaining or enjoying leftovers throughout the week. Once completely cooled, cover loosely with plastic wrap or aluminum foil and refrigerate for up to four days. The crust maintains its crispness surprisingly well when stored properly.
For longer storage, wrap individual slices tightly in plastic wrap, then place in a freezer-safe container. Frozen slices maintain quality for up to three months. To reheat, simply warm individual portions in a 350°F oven for 10-15 minutes or microwave briefly until heated through. The filling will bubble gently again, restoring that just-baked appeal.
FAQs
Can I use fresh cherries instead of canned filling? Absolutely. Pit about 5 cups of fresh cherries and cook them with 3/4 cup sugar, 1/4 cup cornstarch, and 1 tablespoon lemon juice until thickened. Cool completely before using in your Easy Cherry Pie.
How do I prevent the bottom crust from getting soggy? Brush the bottom crust lightly with beaten egg before adding the filling. This creates a moisture barrier that keeps the pastry crisp throughout baking and storage.
Can I make this Easy Cherry Pie ahead of time? Yes, you can assemble the pie up to 24 hours in advance and refrigerate it unbaked. Add an extra 5-10 minutes to the baking time when baking straight from the refrigerator.
What if my filling bubbles over during baking? Place a baking sheet on the rack below your pie to catch drips. If significant overflow occurs, reduce the oven temperature by 25 degrees for the remaining bake time.
Can I freeze a whole baked Easy Cherry Pie? Yes, cool completely, wrap tightly in plastic wrap and foil, then freeze for up to three months. Thaw overnight in the refrigerator before reheating.
How do I make a lattice top for this pie? Cut the top crust into 1-inch strips and weave them over the filling in an over-under pattern. Trim and crimp the edges as usual for a stunning presentation.
Final Thoughts
There’s nothing quite like the satisfaction of pulling a gorgeous Easy Cherry Pie from your oven and watching everyone’s faces light up. This recipe proves that classic desserts don’t need to be complicated to be extraordinary. The combination of convenience ingredients and simple techniques creates something that tastes completely homemade and looks professionally crafted.
Save this pin for your next summer gathering or weekend baking project, and don’t forget to share it with friends who appreciate beautiful, approachable desserts. Your Easy Cherry Pie is about to become the most requested recipe in your collection.